


The Easy Python CI/CD Pipeline Using Docker Compose and GitHub Actions
Continuously deploy a real world project on a VPS


Codecast is a reader supported publication, so if you like reading tutorials like these, subscribe (for FREE) otherwise this little post will also get lost in the sea of posts online and you’ll likely never find it again👇
Managing a live project on a remote server practically needs a few areas in which we desire to cut manual intervention and replace it with automated services. A a primary instance, every time we push some new code to our GitHub repository, we may want to do any of the following in a sequence:
Run tests on our project
Update the Docker image with a new build
Deploy the app with the newly built image to our server
The complexity associated with each of these processes in of itself is not trivial, and when you need to do them in a sequence every single time, it becomes a chore. Therefore, automating the integration and deployment hold great value in the eyes of developers.
Here, we take a look at an easy way of automating the CI/CD pipeline with Docker compose and GitHub Actions.
Building a discord bot with discord.py and FastAPI
I wanted to demonstrate the whole pipeline on a project that I’ve been working on recently, which is a discord bot being written in discord.py for bringing elegant polling service inside the discord servers.
The bot repository is located here. Here is the project structure I’m working with:

If you want to follow along, the two main requirements for this project can be installed simply with the following command within your virtual environment:
pip install discord.py fastapi "uvicorn[standard]" python-dotenvThediscord.py is the primary library that allows us to build discord apps. FastAPI and its ASGI webserver uvicornwill keep the bot alive on a server when deployed. Lastly, python-dotenv is a simple library that will help us use environment variables within our project.
Note: If you’re following along, you might want to go make an app and a bot in the discord developer portal and capture its token.
We will use this token in the.envfile inside the project root as you see in the image above.
Let’s quickly look at the bot code now, shall we?
import asyncioimport discordfrom dotenv import load_dotenvimport osfrom discord.ext.commands import Botload_dotenv()TOKEN = os.environ.get('DISCORD_TOKEN')We first take load the environment variables and access the token with our dotnev library.
Now, we define our bot as follows:
intents = discord.Intents.all()bot = Bot(command_prefix='!', help_command=None, intents=intents)The command prefix allows us to use the bot to respond only to specific commands.
To keep this article simple for now, we only want the bot to do one thing:
Read if a specific command is entered in the message, if yes, reply to it.
Next, we want to capture the text from an incoming message, and we do that with the on_message function:
@bot.eventasync def on_message(message): # Do not reply to self if message.author == bot.user: return # Do not reply to any other bot if message.author.bot: return # get the message content msg = message.content.lower() # reply to the ping message if "!ping" in msg: await message.reply("Pong!", mention_author=False)Let’s wrap this up in our asynchronous API now, shall we?
from fastapi import FastAPIapp = FastAPI()@app.get("/")def main(): return "The bot is alive!"# run the bot as a FastAPI async function@app.on_event("startup")async def run(): """ to run the bot as a FastAPI async func """ try:
asyncio.create_task(bot.start(TOKEN)) except: await bot.logout()Now, run the bot with the following shell command:
$ uvicorn run_bot:app --reload --port 8443 --host 0.0.0.0You’ll see the following output with the server running:

You should be able to see your bot come online in your server too.
Now, let’s containerize this entire workflow for easy deployment on our VPS.
Building a Docker setup
Now that we have a working API, the next step is to containerize our app. Let’s build a Dockerfile to get started on that:
touch DockerfileNow, we want to get started with the following:
downloading and installing a suitable Python version
copying our project folder into the container,
installing all dependencies from
requirements.txtand finally, exposing needful ports
Let’s add these lines to our Dockerfile:
FROM python:3.10.2-slim-bullseye# Set environment variablesENV PIP_DISABLE_PIP_VERSION_CHECK 1ENV PYTHONDONTWRITEBYTECODE 1ENV PYTHONUNBUFFERED 1COPY . /pollsome_srcWORKDIR /pollsome_srcRUN pip install -r requirements.txtEXPOSE 8443We can stop here and use the docker build command to build/update/stop our containers but we can go a step further and make a docker-compose file for a much more simpler setup:
touch docker-compose.ymlSo we want our docker-compose file to use the Dockerfile to perform all the steps we mentioned above, and also run our API (bot) using the uvicorn command.
We do it like this:
version: "3.9"services: bot: build: . volumes: - .:/pollsome_src ports: - "8443:8443" command: uvicorn run_bot:app --reload --port 8443 --host 0.0.0.0Now, we can simply use the following command to build a new image and start a container based on the image:
docker compose up --build -d --remove-orphansIf we want to stop the container, or show some logs, we can do:
docker compose down# anddocker compose logsOptional step: Build a Makefile for executing these set of tasks using simpler, easier to use commands.
touch MakefileThen insert the following instructions into the file:
build:
    docker compose up --build -d --remove-orphans
up:
docker compose up -ddown:
docker compose downshow_logs:
docker compose logsGreat! Now we have built the whole foundation for our API!
Let’s test it:
make buildYou’ll see the following output:

To stop the container, do the following:
make down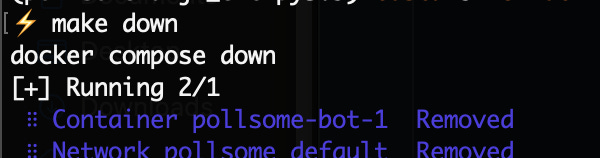
Finally, commit and push your code to the GitHub repository.
Manual Deployment on Remote Server
Let’s go ahead and deploy our project on our rented VPS.
The first step is to SSH into your server and clone the repository.
If you’re wondering how to go about setting up GitHub access on your remote server with SSH, go ahead and follow these instructions first:

git clone git@github.com:yourusername/repositoryname.gitIf you have docker installed on your system already, go ahead and type:
make buildand see your image get built and container started.
Well done! The part one of the “deployment handshake” as I now call it, is over. Now we only want to automate this process with an external service.
Automating Deployment with GitHub Actions
Here we now want the following to happen:
As soon as we make new changes to our code on local machine, we commit and push it our online Github repository.
This action should execute a workflow to login into our VPS, pull the latest code onto the VPS, build a new Docker image from the new code and start a container for the same.
It also gets rid of the older dangling images as a clean up process.
To get started on this, we make use of GitHub Actions.
In the root of our project, let’s create a new file as follows:
mkdir -p .github/workflows
touch .github/workflows/main.yml
In the file, first we want to name the workflow:
name: Bot CI-CDNow, we want to create workflow triggers.
Triggers define when these processes will get executed. Remember we want them to upon a code push to the main branch? Let’s mention it like this:
on:
    # Triggers the workflow on push or pull request events but only for the main branch

    push:
branches: [main] pull_request: branches: [main] # Run this workflow manually from the Actions tab on Repo homepage
workflow_dispatch:As an aside, we might also want to run this workflow manually from the Actions tab on Repository homepage. The workflow_dispatch trigger helps with that.
Now, we want to specify a deployment “job”. For that, we first need to define some environment variables in our GitHub repository.
Go to Settings -> Secrets -> Actions and add a new repository secret.
Add the following secrets one by one:
VPS_SSH_HOST — this the host IP address of your server.
VPS_SSH_USERNAME — this is the username from your user@ipaddress login.
VPS_SSH_SECRET — this is the private SSH key that you set up for GitHub access on your server.
VPS_SSH_PORT — this is the port number for SSH access. Typically, it’s port 22.
SSH_PASSPHRASE — this is the passphrase if you supplied any during creation of your SSH key.
PROJECT_PATH — This is the entire project path of your project’s root directory. For example,
/home/username/path/to/your/projectrootdirectory
Now, finally, we can specify the deployment job in our yaml file:
jobs:
    deploy:
        runs-on: ubuntu-latest
        steps:
            - name: Deploy to VPS
              uses: appleboy/ssh-action@master
              with:
                  # VPS IP
                  host: ${{ secrets.VPS_SSH_HOST }}

                  # VPS username
                  username: ${{ secrets.VPS_SSH_USERNAME }}

                  # SSH key (copy it from your local machine)
                  key: ${{ secrets.VPS_SSH_SECRET }}
# SSH port
port: ${{ secrets.VPS_SSH_PORT }} # passphrase
passphrase: ${{ secrets.SSH_PASSPHRASE }} script: | cd ${{ secrets.PROJECT_PATH }} git pull origin main make down make build echo "Deleting old image(s)..." docker image prune -a -fWe use uses: appleboy/ssh-action@master to specify the login action with SSH. It’s a custom GitHub action taken for convenience from here.
And there we go, we have our Action ready! Now, push your repository to see the magic!
Conclusion
There we go, this is how we automate our integration and deployment for our project by creating a CI/CD pipeline with Docker and GitHub Actions.
If you want to take a look at the repository, it’s here.
There are a few more things you could experiment with after having mastered this simple workflow: creating multiple docker containers and managing them with a CI/CD acton using Docker Swarm. Setting up automated logging for your containers for constant monitoring is also a task that’s well desired in medium sized or large projects.